Community Training Classes & Labs > F5 Solutions for Kubernetes Index
2.3.1. F5 ASP and kube-proxy Deployment
To use ASP, we will need to add a Application Services Proxy(ASP) instance to Every Node
Every node in the cluster needs to run an instance of ASP. The steps below demonstrate how to use a Kubernetes ConfigMap and DaemonSet to run one Application Services Proxy per node and apply the same configurations to each ASP instance.
The DaemonSet ensures one Application Services Proxy runs per node in the Kubernetes cluster. The ConfigMap contains the configurations you want to apply to each ASP instance.
The first step will be to load the relevant F5 container images into our system. The ASP container image has been pulled in our private registry. Normally, you would retreive ASP from the Docker Store (requires account and accepting a EULA, freely distributed).
Official F5 ASP documentation can be found here: Install the F5 Kubernetes Application Service Proxy and Deploy the F5 Application Service Proxy with the F5 Kubernetes Prox
2.3.1.1. Deploy ASP
To deploy ASP, we will need to add the following configuration to our Kubernetes solution:
- A configmap: The ConfigMap contains the configurations you want to apply to each LWP instance.
- A daemonset: The DaemonSet ensures one Application Services Proxy runs per node in the Kubernetes cluster.
To setup those components, connect to the master and do the following:
create a yaml file called f5-asp-configmap.yaml and here is the content to copy/paste into it. —> Please use the file in /home/ubuntu/f5-demo
kind: ConfigMap
apiVersion: v1
metadata:
  name: f5-asp-config
  namespace: kube-system
data:
  asp.config.json: |-
    {
      "global": {
        "console-log-level": "info"
      },
      "orchestration": {
        "kubernetes": {
          "config-file": "/var/run/kubernetes/proxy-plugin/service-ports.json",
          "poll-interval": 500
        }
      }
    }
After the configmap file, we can setup the daemonset file. Create a file called f5-asp-daemonset.yaml and here is the content to copy/paste into it. —> Please use the file in /home/ubuntu/f5-demo
apiVersion: extensions/v1beta1
kind: DaemonSet
metadata:
  name: f5-asp
  namespace: kube-system
spec:
  template:
    metadata:
      labels:
        name: f5-asp
    spec:
      hostNetwork: true
      containers:
        - name: proxy-plugin
          image: "store/f5networks/asp:1.0.0"
          args:
            - --config-file
            - /etc/configmap/asp.config.json
          securityContext:
            privileged: false
          volumeMounts:
          - mountPath: /var/run/kubernetes/proxy-plugin
            name: plugin-config
            readOnly: true
          - mountPath: /etc/configmap
            name: asp-config
      volumes:
        - name: plugin-config
          hostPath:
            path: /var/run/kubernetes/proxy-plugin
        - name: asp-config
          configMap:
            name: f5-asp-config
Once our files are created, we can use them to create the relevant ConfigMap and Daemonset to start our ASP instances.
On the master, run the following commands:
kubectl create -f f5-asp-configmap.yaml

kubectl create -f f5-asp-daemonset.yaml
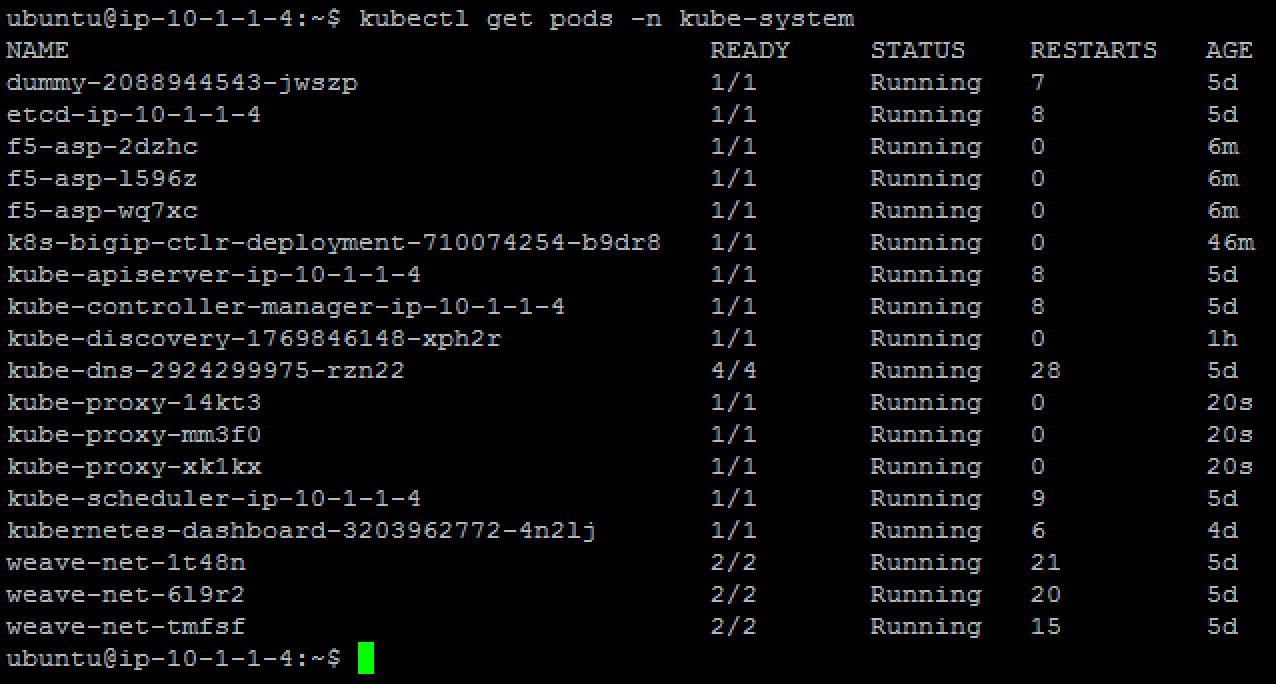
Here the ASP should be deployed automatically. You should have as many ASP instances launched as kubernetes systems you have in your kubernetes cluster (in the Ravello blueprint, there are three - 3). You can validate this with the following commands:
kubectl get pods -n kube-system
There should be three entries in the table returned by the command above that start with “f5-asp-“. The ASP instances are deployed. Now we need to update the kube-proxy with the F5-kube-proxy instances so that we can leverage our ASP.
2.3.1.2. Deploy f5-kube-proxy
Right now, we have a Daemonset that is used to deploy the default kube-proxy. We will retrieve it to delete the existing instances.
To retrieve the kube-proxy daemonset config, run the following command to review its configuration:
kubectl edit ds kube-proxy -n kube-system
It should launch a VI editor, save the configuration with the following command in vi :
:w /tmp/kube-proxy-origin.yaml
Exit the VI editor with
:q
Now, we can create our new daemonset to launch the F5-kube-proxy. create a new deamonset yaml called f5-kube-proxy-ds.yaml
vi /tmp/f5-kube-proxy-ds.yaml
Here is the content of the file, copy/paste it. —> Please use the file in /home/ubuntu/f5-demo
# Please edit the object below. Lines beginning with a '#' will be ignored,
# and an empty file will abort the edit. If an error occurs while saving this file will be
# reopened with the relevant failures.
#
apiVersion: extensions/v1beta1
kind: DaemonSet
metadata:
  creationTimestamp: null
  generation: 1
  labels:
        component: kube-proxy
        k8s-app: kube-proxy
        kubernetes.io/cluster-service: "true"
        name: kube-proxy
        tier: node
  name: kube-proxy
  selfLink: /apis/extensions/v1beta1/namespaces//daemonsets/kube-proxy
spec:
  selector:
        matchLabels:
          component: kube-proxy
          k8s-app: kube-proxy
          kubernetes.io/cluster-service: "true"
          name: kube-proxy
          tier: node
  template:
        metadata:
          annotations:
                scheduler.alpha.kubernetes.io/affinity: '{"nodeAffinity":{"requiredDuringSchedulingIgnoredDuringExecution":{"nodeSelectorTerms":[{"matchExpressions":[{"key":"beta.kubernetes.io/arch","operator":"In","values":["amd64"]}]}]}}}'
                scheduler.alpha.kubernetes.io/tolerations: '[{"key":"dedicated","value":"master","effect":"NoSchedule"}]'
          creationTimestamp: null
          labels:
                component: kube-proxy
                k8s-app: kube-proxy
                kubernetes.io/cluster-service: "true"
                name: kube-proxy
                tier: node
        spec:
          containers:
          - command:
                - /proxy
                - --kubeconfig=/run/kubeconfig
                image: f5networks/f5-kube-proxy:1.0.0
                imagePullPolicy: IfNotPresent
                name: kube-proxy
                resources: {}
                securityContext:
                  privileged: true
                terminationMessagePath: /dev/termination-log
                volumeMounts:
                - mountPath: /var/run/dbus
                  name: dbus
                - mountPath: /run/kubeconfig
                  name: kubeconfig
                - mountPath: /var/run/kubernetes/proxy-plugin
                  name: plugin-config
                  readOnly: false
          dnsPolicy: ClusterFirst
          hostNetwork: true
          restartPolicy: Always
          securityContext: {}
          terminationGracePeriodSeconds: 30
          volumes:
          - hostPath:
                  path: /etc/kubernetes/kubelet.conf
                name: kubeconfig
          - hostPath:
                  path: /var/run/dbus
                name: dbus
          - name: plugin-config
                hostPath:
                  path: /var/run/kubernetes/proxy-plugin
status:
  currentNumberScheduled: 0
  desiredNumberScheduled: 0
  numberMisscheduled: 0
  numberReady: 0
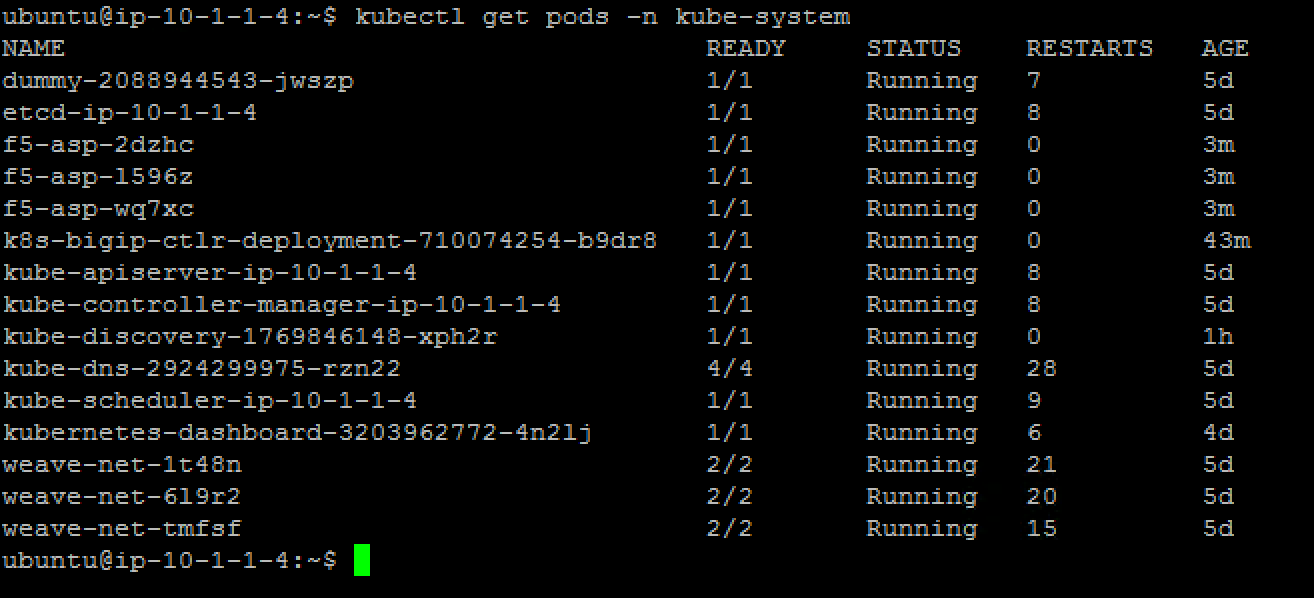
Now that we have the legacy ds config and the updated one, we can delete the existing kube-proxy ds with the following command:
kubectl delete -f /tmp/kube-proxy-origin.yaml
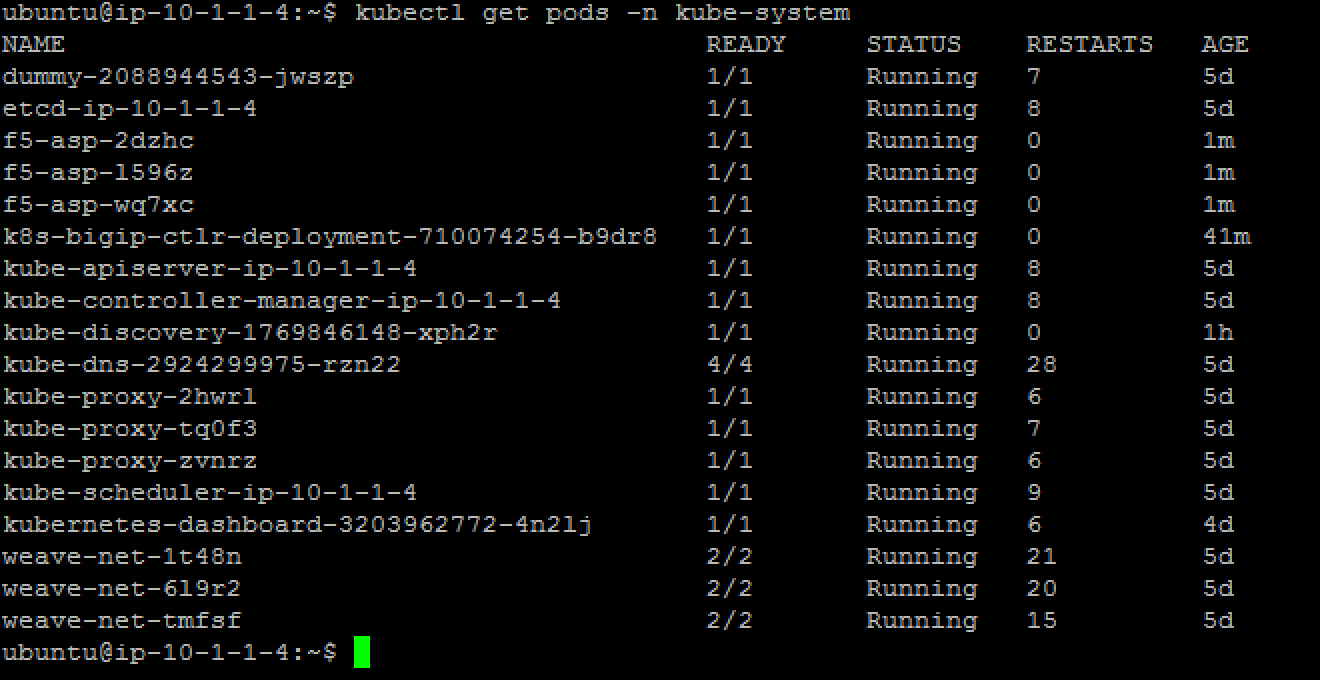
You can check that the kube-proxy instances have been removed from Kubernetes with the following command
kubectl get pods -n kube-system
or
kubectl get pods --all-namespaces
Note that the entries starting with “kube-proxy-” in the table.
We can deploy the updated daemonset:
kubectl create -f /tmp/f5-kube-proxy-ds.yaml
You can check that the deployment was successful with the command:
kubectl get pods -n kube-system